How do I bulk import existing customers?

If you’re just getting started with getSoapy or have bought a new round (congrats by the way!), bulk importing customer data is quick and easy.
Use this method to import multiple customers from another system such as Squeegee or Cleaner Planner, or from a spreadsheet (CSV format).
The first step is to prepare the data you want to import, and then import it into getSoapy.
If your customers are in a round book or on paper, you can import them from photos instead.
Preparing your data
If you're importing customer data from another platform, you'll need to export your data as a single CSV file. This file should include all the customer details (name, address, phone number, etc.) and the details about their job (frequency, cost, etc.). It doesn't matter which order these columns are in.
If you're importing customer data from a spreadsheet, you'll need to export it as a CSV file (using the default settings should be fine).
In all cases, your CSV file should contain a single header row, with each column representing a different piece of information. Each customer should be on a separate row, with their details in the corresponding columns. You can see an example CSV below.
There are no strict rules about what columns you need to include, what they should be called, or which order they should be in. However, clear column names will help our AI match your data to the right fields in getSoapy.
If you're unable to get your data into CSV format, you can always drop us a message in the app and we'll help you out.
To export data from Squeegee go to the Reporting section then select 'All job data', and download the CSV. You'll import this CSV into getSoapy in the next step.
To export data from Cleaner Planner go to the Customer tab or Jobs tab and click 'Export'. Import either the Customers.csv or Jobs.csv into getSoapy in the next step but make sure you don't import both CSVs to avoid creating duplicate customers or jobs.
Importing your data
Once you've prepared your data in CSV format, you can import it into getSoapy:
The customers you import aren't sent any notifications unless you turn on Send customer notifications when you start the import. If you do, they'll get the customer notifications you have turned on, such as Customer Welcome.
Go to
Tools>Settings>Data>Importor search forImport.Click
New import.Choose
Spreadsheet (CSV).Under
Import options, choose whether toImport customer balances,Use scheduled or next due datesandSend customer notifications. If your file needs a bit more explanation, for example which column holds business names, add it underExtra instructions for the AI.Under
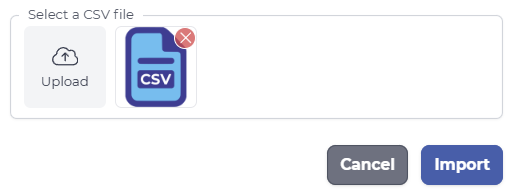
Select a CSV file, click on theUploadicon.

Select the CSV file you'd like to import from your device.
It will take a second or two to upload (depending on the file size). Once it has, click
Import.
- Our AI will do its thing and match your CSV data to the right fields in getSoapy. Once the import is complete you'll be able to see a summary of the results. It might take a few more minutes for all the data to be visible, but if anything doesn't look right you can always drop us a message in the app and we'll help you out.
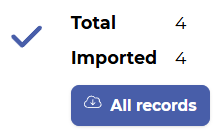
You can also download a file with any customers we were unable to import (choose Not imported from the import's menu), so you can fix any issues and try again. Remember to remove any customers that were imported successfully to avoid duplicate records.
Example CSV
If you're not sure what your CSV should look like, here's an example.
Please note this is just an example. You don't need to follow it exactly.
| Name | Address | Postcode | Balance | Phone | Services | Frequency | Cost | |
|---|---|---|---|---|---|---|---|---|
| John Smith | 123 Fake Street | EH1 1AB | 0 | 01234 567890 | john@smith.com | Residential Window Cleaning | 2 Weeks | 20.00 |
| Jane Doe | 456 Made Up Road | EH2 2CD | - 10.00 | 09876 543210 | Residential Window Cleaning | 4 Weeks | 30.00 | |
| Bob Wilson | 789 Test Avenue | EH3 3EF | 15.00 | 07123 456789 | bob@wilson.com | Commercial Window Cleaning | Monthly | 100.00 |
| Sarah Jones | 321 Sample Lane | EH4 4GH | 0 | 07987 654321 | sarah@jones.com | Residential Window Cleaning | 8 Weeks | 45.00 |
| Sarah Jones | 321 Sample Lane | EH4 4GH | 0 | 07987 654321 | sarah@jones.com | Gutter Cleaning | Annually | 150.00 |
| Mike Brown | 654 Example Close | EH5 5IJ | -5.00 | 01234 987654 | mike@brown.com | Residential Window Cleaning | 4 Weeks | 25.00 |
Importing from photos of paper records
If you keep your round in a book or on paper lists, take photos of the pages and our AI will read them. You don't need to type anything up first.
Imports can't be undone, so try a page or two first. If those customers look right, import the rest of the pages.
Go to
Tools>Settings>Data>Importand clickNew import.Choose
Photos of paper records.Choose your
Import options, the same as for a CSV. If the AI needs to know something about your pages, add it underExtra instructions for the AI, for example "Each page is a different round, named at the top."Under
Photos, add up to 30 photos. On a phone, you can take them there and then. See taking good photos below.Click
Import. The import showsReadingwhile our AI reads your photos, which can take a few minutes. Then we import your customers the same way as a CSV.
Our AI looks for each customer's name, address, phone number, email, balance and notes. For their job, it looks for the services, how often, the price, the round, and when it was last done and is next due. It also follows how the page is laid out:
- A heading, such as a round name or a street, applies to every customer below it.
- Crossed-out entries are skipped.
- If a customer has several visit dates, the latest one becomes their last done date.
- A date only becomes the next due date if it's marked as next or due.
When the import has finished, choose All records from the import's menu to see exactly what was read from your photos. If a photo couldn't be read, you'll see a count under Photos not read. Retake those pages and import them on their own.
Taking good photos
- One page per photo.
- Lay the page flat and take the photo from straight above.
- Use good light, and avoid shadows and glare from the flash.
- Get the whole page in shot, with the writing sharp enough to read.