How do I add a job?
There are several ways to add a job in getSoapy:
- if you've provided a quote for the job, you can create a job from a quote
- you can manually add a job to an existing customer
- you can add a job when adding a new customer manually
Create a job from a quote
Search for the quote or go to
Tools>Manage>Quotesand select the quote you want to convert to a job.Click on the menu icon in the top-right corner and select
Convert to jobs.

- Select from the options in the
Convert to jobsform.
- Select any
Jobs to create(optional). There may be more than one option if you've provided a simple estimate and/or cost breakdown. You can also selectQuoteto schedule a visit to provide a quotation using the job and scheduling functions.
If you create a job based on the 'Simple estimate', the lower estimate will be used as the cost. This can be edited once the job is created.
- Add the job(s) to a round using the
Add jobs to rounddrop-down menu (optional). - Toggle
Close quoteto remove it from the quotes page (optional). Closed quotes can still be found using the quotes filter.
- Click
Convert to jobsto create the job(s). If the quote isn't already linked to a customer, this also adds them as a new customer.
Manually add a job to an existing customer
This method assumes you've already added the customer. To add a new customer, see How do I add a customer?
Search for the customer you want to add a job to or go to
Tools>Manage>Customersand select the customer.Select the Jobs tab below the customer's details.
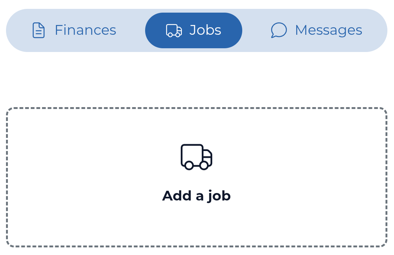
- Click
Add a job.
You might need to scroll down to find this button if other jobs have already been added to this customer.
- Enter/select the essential job details into the
Add jobform:
Only the fields marked with a red asterisk (*) are required to save the job, but complete as many fields as possible to help with automatic planning.
- Enter a job
Title(optional). This is for your reference only and helps to distinguish multiple jobs for the same customer. - Select a
Service(required). You can select multiple services if necessary. You can also select+ Add servicesif you need to add a new service. - Select the
Frequencyfrom the drop-down menu (optional). If this is a recurring job, select the number of 'Weeks', 'Months', or 'Years' between jobs to let getSoapy know when to schedule future jobs. - Add the job to a
Roundusing the drop-down menu (optional). - Enter a lump sum in the
Costfield (optional) or leave it blank if you want to add a cost breakdown later.
- Open the
Cost & billingsection to enter/select billing information:
- Toggle the
One-time invoice adjustmentoption to adjust the cost of the job the first time it's billed (optional). This is handy if the first clean is more expensive, or if you have an introductory offer. - Toggle
Split invoice into multiple paymentsunderInstalmentsto spread the cost of the job across several payment dates (optional). Instalments are available on the Advanced and Pro plans. - Enter the
Purchase orderreference if your customer requires you to include it on your invoices (optional).
- Open the
Scheduling & extrassection to enter/select additional job information:
- Toggle
Advanced Schedulingif the job should only be scheduled on certain days, weeks, or between specific times (optional). This can help if a property can only be accessed on certain days or if parking restrictions apply at certain times.
The Week of month option considers the first week of a month to be the first week that contains a Thursday. For example, if the 1st of the month is a Friday, Saturday, or Sunday, then the first week of the month begins the following Monday. This is consistent with the ISO 8601 week numbering system, which we use to calculate week numbers throughout the app.
- Select a
Durationfor the job to help with scheduling (optional). - Enter any
Notesfor your personal reference (optional). - Toggle
Use a different addressif the job address is not the same as the customer's main address (billing address). - Add any
Tagsto help organise or highlight important information (optional). - Add any photos as
Attachmentsto this job (optional). Attachments added here are for your team's internal reference. This can be a helpful way to record which parts of a property should be cleaned or how to access the property.
- Click
Saveto save the job and add it to the selected customer.
If you didn't enter a lump sum in the Cost field, see How do I adjust the price of a job? to add a cost breakdown.